If you have spent any time with a 3D printer, you know the feeling. You find a fantastic 3D model online, send it to your machine with high hopes, and return a few hours later only to find a bird’s nest of plastic spaghetti. You don’t normally think about 3D print orientation.
When a print fails, our first instinct is usually to blame the print bed levelling, nozzle temperature, or filament quality. But more often than not, the culprit isn’t a mechanical glitch – it is simply how the model was angled on the build plate. Choosing the right print orientation is one of the most effective ways to boost print quality, improve structural strength, and eliminate frustrating failures.
The Spider Dilemma: A Lesson in Gravity
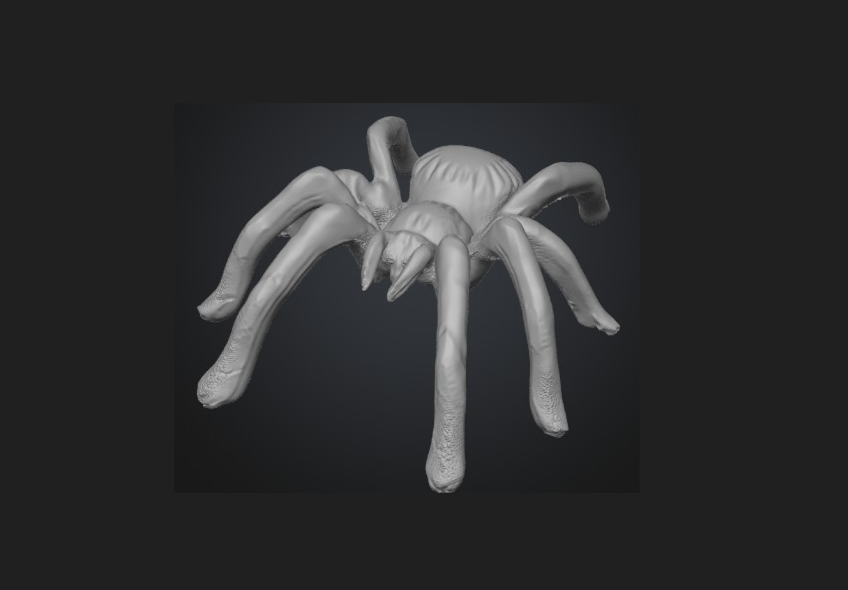
To see how much orientation matters, consider a recent problem I had with a customer order. A detailed model of a spider.
The customer had a metal spider and asked if I could create some 3D printed copies. I created the model and printed a scaled down prototype without issue.
Naturally, as would most people, I imported the model into the slicer software and place it flat on its feet, just as it would stand in real life. On the surface, this seems logical. In practice, printing a spider legs-down is a recipe for disaster.
It was when I scaled up, the problems started; legs would fail or not print correctly. After playing around with supports, walls and infill, I finally thought about 3D print orientation.
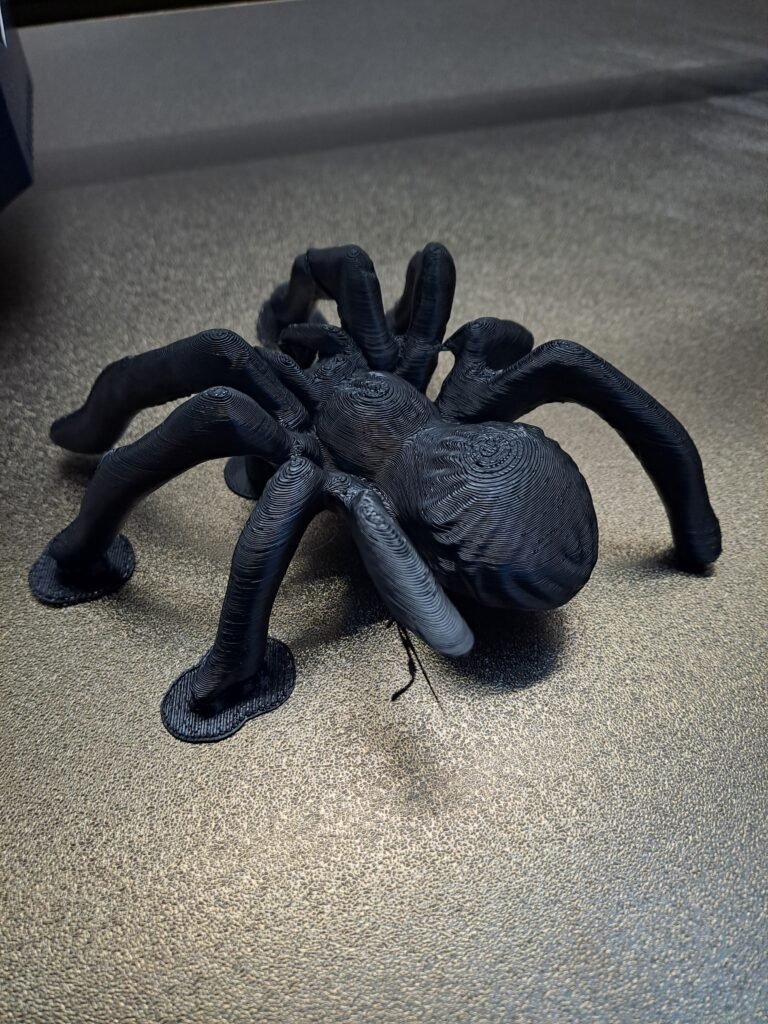
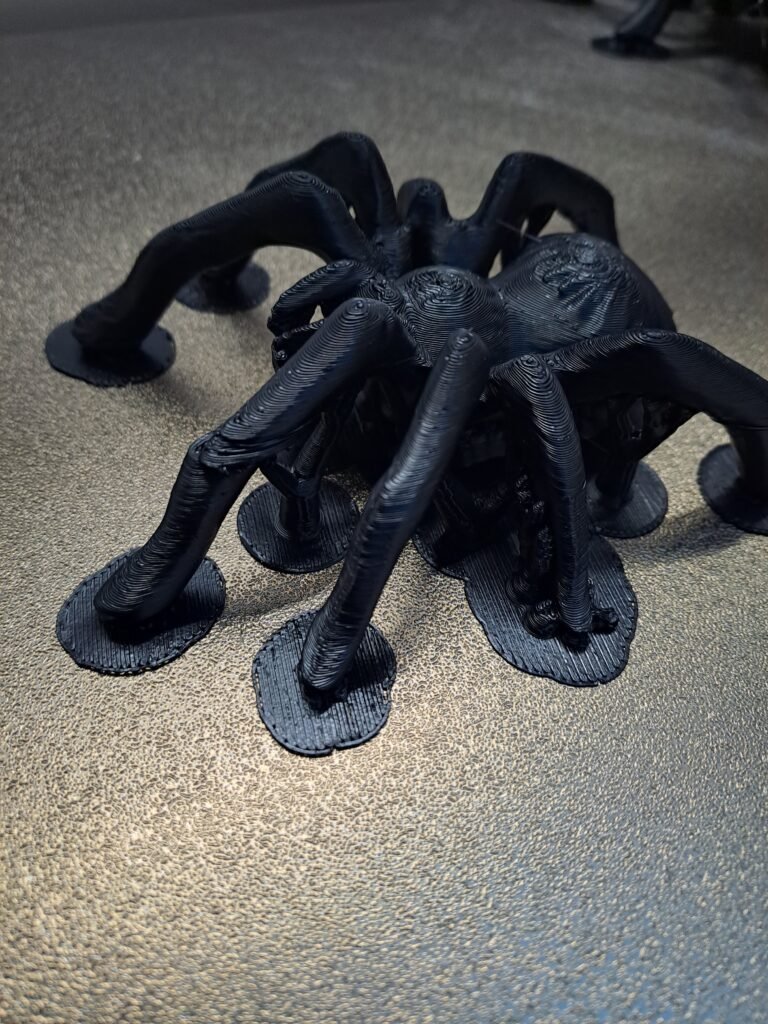
Standard Orientation (Legs Down) and the Optimised Orientation (Flipped)
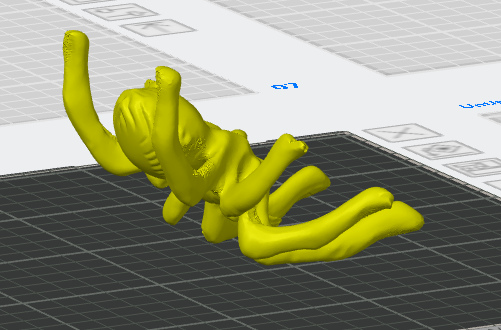
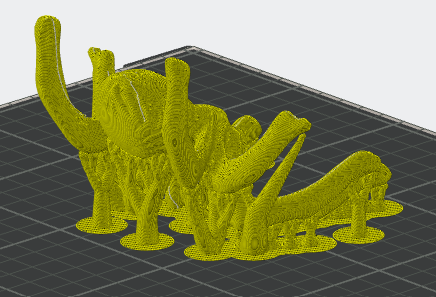
(Need heavy supports!) (Minimal overhangs)
Why? Fused Deposition Modelling (FDM) 3D printers build models from the ground up, layer by layer. They cannot deposit molten plastic into thin air. A spider standing on its legs has long, thin, diagonal limbs extending upwards from small contact points on the bed. As the print head moves back and forth, it pushes against these delicate stalks. Without massive amounts of temporary support structure, the legs wobble, lose adhesion, and collapse halfway through.
By simply flipping the 3D print orientation of the spider 180 degrees onto its flat back – or even resting it on its head – the entire dynamic changes:
- Greater Surface Area: The widest, sturdiest part of the model now touches the print bed directly, creating a rock-solid foundation.
- Shorter Overhangs: The legs now angle upwards away from the body rather than dangling in mid-air, allowing the printer to bridge the gaps effortlessly.
- Fewer Supports: You drastically reduce the need for plastic support columns, saving material and cleanup time.
- A print that was guaranteed to fail when standing upright suddenly prints cleanly, all thanks to a simple flip.
The Three Rules of Smart Orientation
You do not need an engineering degree to orient your models effectively. Whenever you load a file into your slicing software, keep these three principles in mind:
1. Build a Strong Foundation
Always look for the largest flat surface on your model and rotate it so it lays flat against the print bed. This maximises bed adhesion, preventing the model from detaching mid-print. If your model lacks a flat surface, consider tilting it at an angle rather than letting it balance on tiny points.
2. Mind the Overhangs
3D printers can comfortably print angles up to about 45 degrees without support. Anything steeper – especially horizontal bridges – will sag or fail. Position your model so that overhangs point upwards relative to the bed, rather than sticking straight out into empty space.
3. Plan for Layer Strength
3D prints are anisotropic, meaning they are weaker along their layer lines. Imagine a wooden stick: it snaps easily along the grain, but is tough to break across it. If you are printing a functional part like a bracket or hook, orient it so the forces pulling on it run parallel to the print bed, not perpendicular to it.
Work With Your Printer, Not Against It
Mastering 3D printing is rarely about buying the most expensive hardware; it is about learning how to work with the physical limitations of the process. Before hitting “print” on your next project, take thirty seconds to rotate the model in your slicer. Look at where the supports fall, check the contact area on the build plate, and ask yourself: Would this print better upside-down?
More often than not, a fresh perspective is all it takes to turn a box of plastic scrap into a flawless final print.
What’s the worst “spaghetti monster” print fail you’ve ever had?
Take 30 seconds before your next job to rotate that model in your slicer – and drop a comment below telling me about a time a simple flip saved your print!